Search This Blog

Monday, August 31, 2015

Rhodes Kingfisher - First Sail


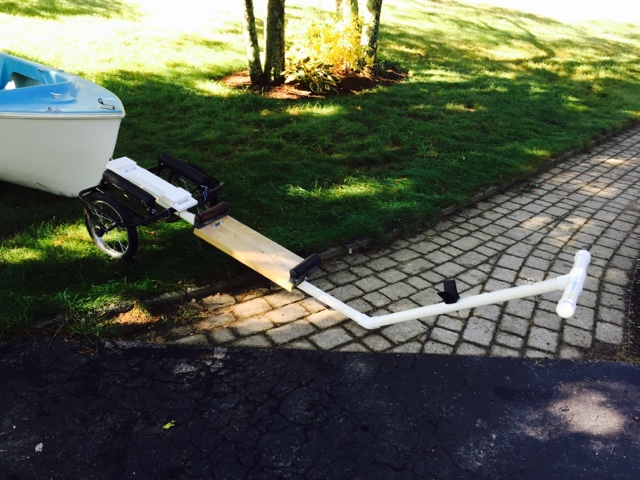
Well, this past Saturday (8/30/15), I had the opportunity to sail this little craft for the first time.  I was able to get a small trailer from a fellow sailor at the Massabesic Yacht Club that fits perfectly.  I only had to adjust the bow mount and it doesn't even need a winch.   When I launched the boat, it just floated off.  When I retrieve the boat after sailing, I just pulled it up by the bow line.  

(As a reminder, we are NOT allowed to get our feet in the water at Massabesic Lake since it is a reservoir for Manchester, NH)


The mast crutch was made out of a scrap 2x6.  I put two bent bolts that go into the rudder mount.  Everything was strapped down with ratchet straps.  The whole thing is fairly light so it tows easily with my wife's 2007 Honda CR-V.  


On arriving at the Yacht Club, a friend came over and helped me step the mast.  It is light enough to step yourself but an extra set of hands is always welcome.  Once stepped, I attached the two shrouds and forestay.   I also made sure I put the windex, jib and main halyards on the mast BEFORE stepping it.

I then launched the boat, and rigged it in the water from the dock.  I think the whole operation took maybe 20 minutes.  (Derigging was equally as easy).  One must remember to drop down the center board before sailing off and raising it before pulling it back out.


From these pictures, you can see I sailed it away from the dock in very light air.  Fortunately, as you can see in the bottom picture, there was a line of air farther out from the mooring field, so I could get the boat moving some.  

It was a blast to sail.  Being used to sailing a Catalina 22, I was reminded how responsive (and tippy!) a small dinghy can be.  I kept her pointed up the whole time (a good thing) but felt very safe in her.

The only complaints are the jib and jib sheets.  The jib luff cannot be tightened - it is either too long or is stretched.  I may make another jib for it out of a scrap sail over the winter.  The cleats for the jib sheets are a little iffy with holding the trim under load.  I'd rather have cam cleats and may raid my Catalina for a few that are not being used, or just buy new ones.  Fortunately, parts for a dinghy are inexpensive when compared to my Catalina which in turn is cheap compared to a 40 footer :-)

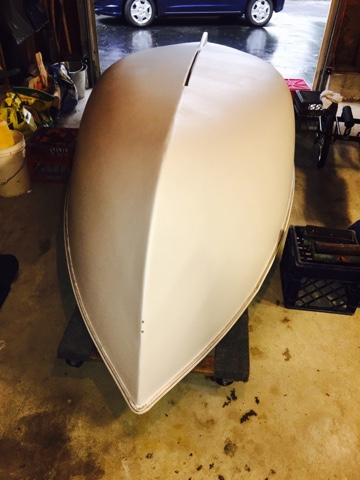
As a 6' 1" 200 lb. 50-year old, I spent most of my time sitting or kneeling on the floor of the cockpit.  That's not going to work for too long.  So, I am already planning on adding two benches (my early version of the Kingfisher does not have the seats that newer ones have - see other pictures).  I will make these out of wood - preferably something classy looking.  

Other improvements I think I'll consider are:

- painting the topsides, inside of the cockpit and all the blue.
- adding a boot stripe and maybe painting the bottom a different color (maybe even use VC17 although I don't intend on ever leaving it in the water)
- Give her a name - I'm thinking of "Barchetta", which is Italian for "little boat".  No, I'm not painting her red - don't ask Rush fans :-)


(Update 9/4...  My friend and fellow sailor Wally V (Hunter 23 "Freebird") came out on the club launch and took this picture of me under sail :-)


Tuesday, August 11, 2015

Rhodes Kingfisher - positive floation

There is a good bit of the original positive floatation still in the boat under the stern seat and under the bow.  But I did remove some and wanted to add more.  I have had considerable luck with using swim noodles in the past with my Mariner and decided to do the same here.

My wife got them for $1.00 each at the Dollar Store or Target.  I got 16 of them and put 8 in the bow and 8 in the stern.  I bundled 4 together with duct tape.  They are out of the way and should not interfere with any gear while sailing.

In this picture, you can also see my high-tech bailer made out of a detergent container.  I am trying to keep this on the cheap.


Rhodes Kingfisher - dolly and assembly

After flipping it over after the paint dried for a few days, I installed the rudder gudgeon mount permanently.  I used stainless steel 1/4"x20 bolts with nylock nuts and washers - all left over from another project.  Each was sealed with butyl tape.  Using 8 bolts is probably overkill but it sure beats the rotted piece of wood that was there when I picked up the boat.

I also removed and reinstalled the cleats for the jib sheets, backing them with 1/2" starboard plates - also overkill but that's how I roll.

Finally I replaced the two pad eyes on the top of the transom where the traveller will connect.  (See a future post on rigging).


The rudder mounted right up and looks great.  I did drill a hole in the bottom pintle, and have a cotter pin attached with a cable as a safety measure so I don't lose this rudder, which is pretty-much irreplaceable.  


I reinstalled a new bow eye - and spliced a nice painter from what I think is an old luff rope from a donated sail for my sail bag projects.  


The dolly was made from a kayak dolly, along with some PVC pipe, scraps of wood and Azec, and the rollers I scavanged from the scrap trailer.  I found the rubber bow piece at Bass Pro Shops.  The dolly works great to move the boat around...  but, I'm not happy with it.  When I pull the boat on the dolly up on my utility trailer, it sits very high and transport will be a pain.  I think I'll revert to a small boat trailer.  One of my fellow Massabesic Yacht Club sailors may have a small trailer to sell me.  That will be my preferred method.


She's looking good.  I love the blue color and it reminds me of one of my first sailboats - a 1968 O'Day Mariner with the same colors.  I can see the resemblance - of course both were designed by Phillip Rhodes :-)

Next year, I may repair some cracks in the blue and repaint the entire top of the boat, along with doing the bilge in gray bilge paint.  


Rhodes Kingfisher - Painting the hull

When I got this boat, remember that I paid exactly $0.00 for it.  The only stipulation was that I had to take the rotted trailer too, which I ended up cutting up and giving to a guy for scrap.  I was able to recycle a few rollers from it though (more on that later).

The hull, while in good shape structurally, was in pretty bad shape gelcoat-wise.  There were chips and repairs all over it.  It would float, but it was not pretty.  

Last year, I sanded the bottom of my Catalina 22 "Blue Skies", and painted it with much success.  I followed suit with this boat.  I sanded the hull down with a random orbit sander with 80-grit disks.  I also filled in the holes with West System epoxy and filler and sanded that smooth too.

Then I followed with 4 coats of Interlux 2000, alternating gray and white.  However, fearing that the gray would show, I did two coats of gray, followed by two coats of white.  This is a two-part paint and was applied with a roller.  

I did sand a little (wet sanded with 220 grit) between the coats to remove any imperfections and drips.  
I'm happy with the results.  There is a little orange peel in it.  If I keep this boat (which I do plan on doing), I will probably wet-sand above the water line and paint it with an Interlux top-side paint, and I'll probably hit the bottom with Interlux VC17M, which I painted my Catalina bottom with.

I'll probably do the bottom paint when I refinish the keel on the Catalina, and if I have any left over after the keel and the Kingfisher, I'll hit the bottom of my Dyer Dhow midget dinghy too.